---
title: Etruscan Temple Diagram
author: Steven Zucker
source: https://www.worldhistory.org/image/6282/etruscan-temple-diagram/
format: machine-readable-alternate
license: Creative Commons Attribution-NonCommercial-ShareAlike (https://creativecommons.org/licenses/by-nc-sa/4.0/)
updated: 1970-01-01
---
# Etruscan Temple Diagram
_Authored by Steven Zucker_
## Image File
[](https://www.worldhistory.org/uploads/images/6282.jpg)
## Image Caption
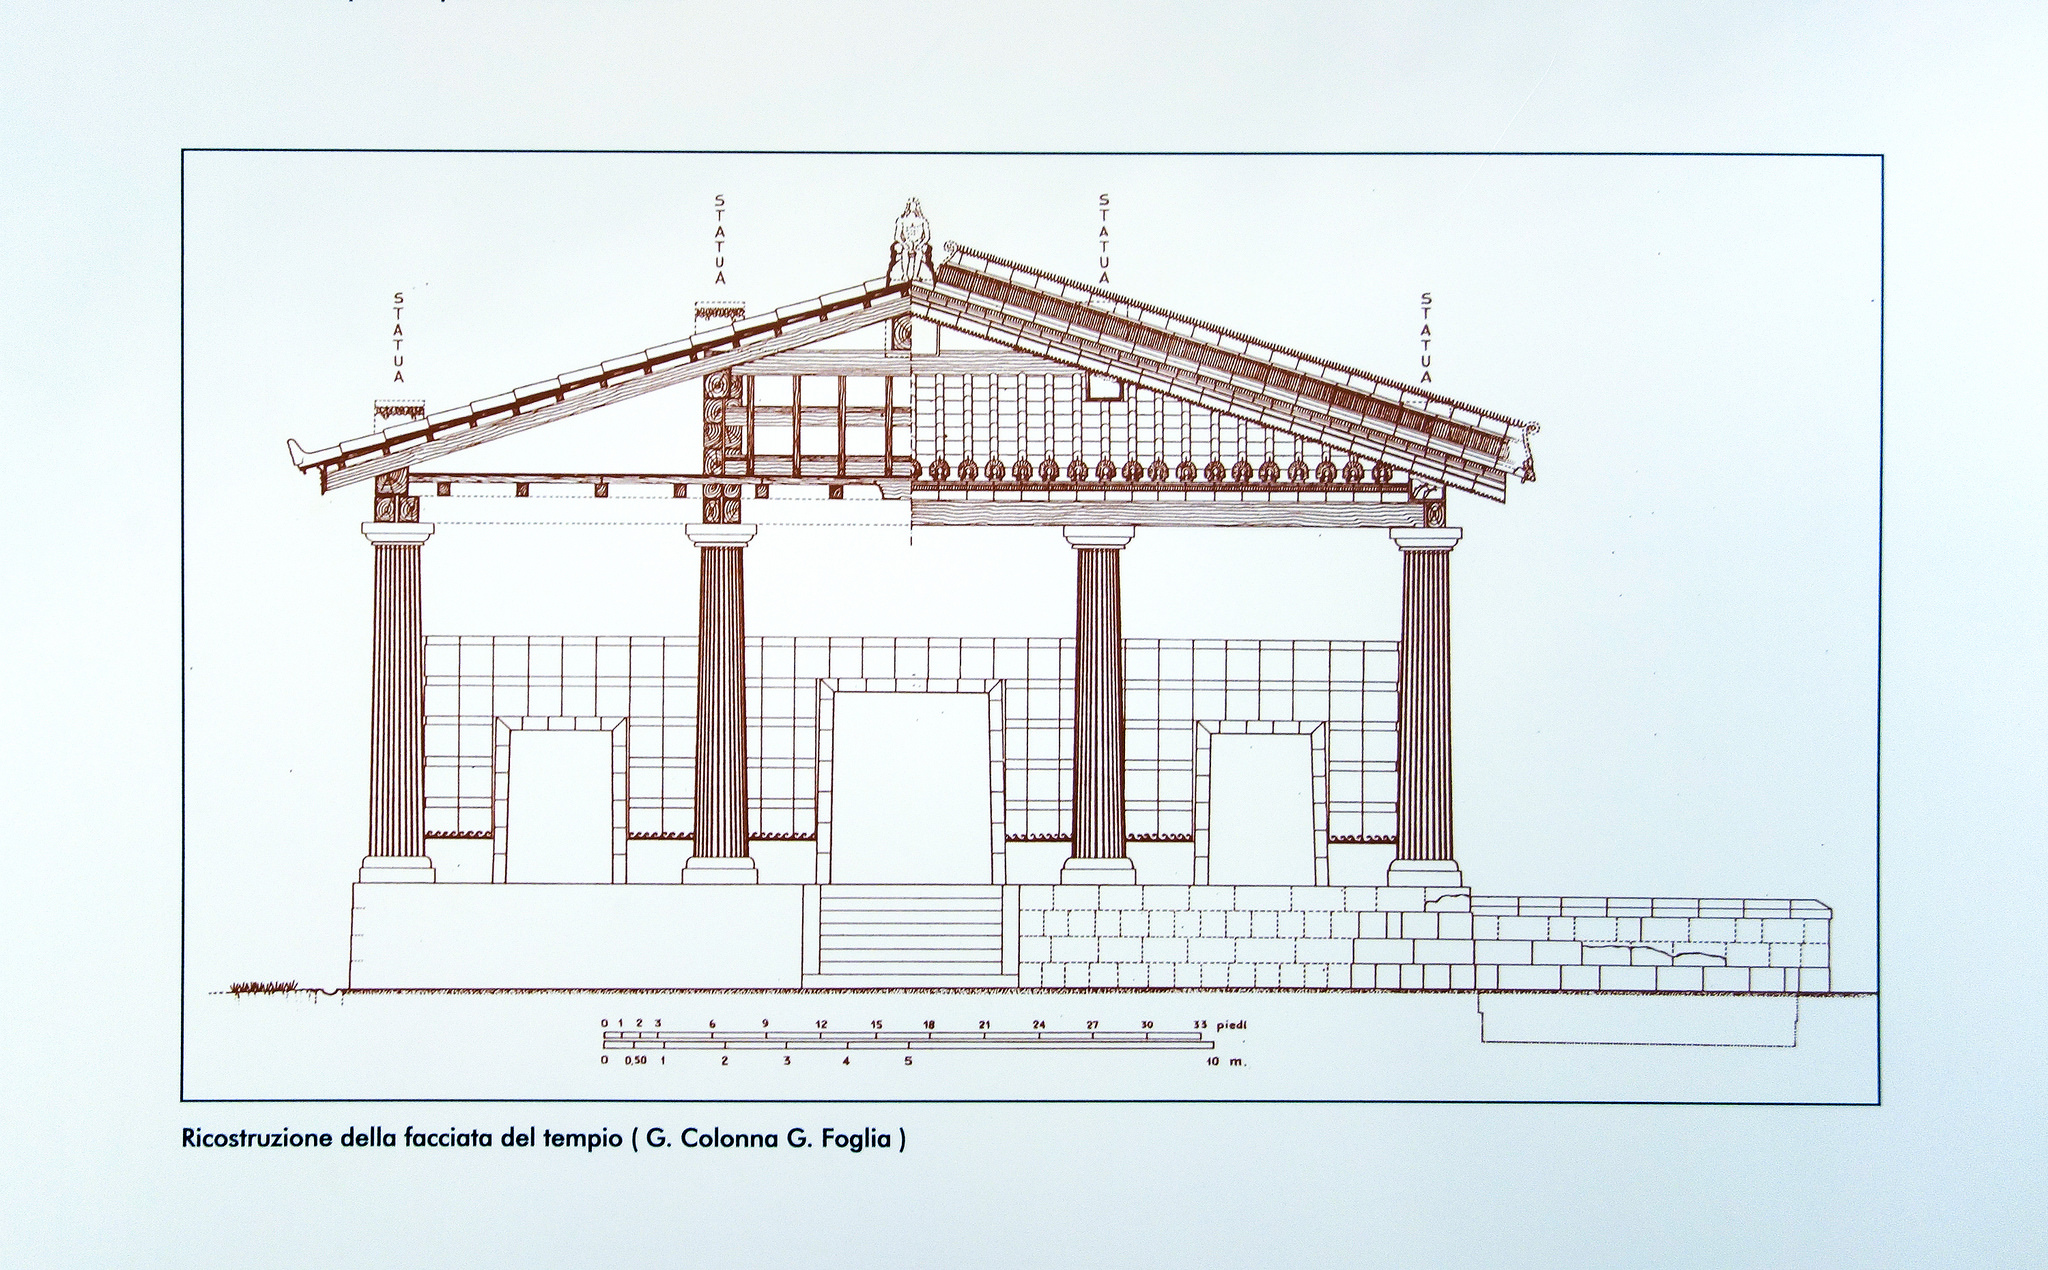
A reconstruction of a typical 6th century BCE [Etruscan](https://www.worldhistory.org/Etruscan_Civilization/) [temple](https://www.worldhistory.org/temple/) such as the Portonaccio Temple at [Veii](https://www.worldhistory.org/Veii/), central [Italy](https://www.worldhistory.org/italy/).
## Cite This Work
### APA
Zucker, S. (2017, January 20). Etruscan Temple Diagram. *World History Encyclopedia*.
### Chicago
Zucker, Steven. "Etruscan Temple Diagram." *World History Encyclopedia*, January 20, 2017. .
### MLA
Zucker, Steven. "Etruscan Temple Diagram." *World History Encyclopedia*, 20 Jan 2017, .
## License & Copyright
[](https://www.flickr.com/photos/profzucker/16748132902/in/photolist-7gV1si-rvY274-rvYyq7-rcKNGc-7A5Uf3-7gYWMs-7gUZDH-5uEtG-5uEtJ-Gduiqr-qWudpH-qWpCAA-7A5UdA-CdKbtV-BEeor8-9QCBNc-BEeiV4-AnzRcX-AJaA6F-LvZYMx-Lp6hqB-Lp6eN2-KyZofL-L5yBP5-LsZV2q-KyZnkE-Lp6ce4-LsZJqq-L5yJv1-LsZK4E-Lp6bui-L5yH81-LsZRqC-H5VLyN-NETstV-C6sJge-BLBGym-yNwi7T-7A5UhC)This image was first published on [Flickr](http://www.flickr.com). [Original image](https://www.flickr.com/photos/profzucker/16748132902/in/photolist-7gV1si-rvY274-rvYyq7-rcKNGc-7A5Uf3-7gYWMs-7gUZDH-5uEtG-5uEtJ-Gduiqr-qWudpH-qWpCAA-7A5UdA-CdKbtV-BEeor8-9QCBNc-BEeiV4-AnzRcX-AJaA6F-LvZYMx-Lp6hqB-Lp6eN2-KyZofL-L5yBP5-LsZV2q-KyZnkE-Lp6ce4-LsZJqq-L5yJv1-LsZK4E-Lp6bui-L5yH81-LsZRqC-H5VLyN-NETstV-C6sJge-BLBGym-yNwi7T-7A5UhC) by [**Steven Zucker**](https://www.flickr.com/photos/profzucker/16748132902/in/photolist-7gV1si-rvY274-rvYyq7-rcKNGc-7A5Uf3-7gYWMs-7gUZDH-5uEtG-5uEtJ-Gduiqr-qWudpH-qWpCAA-7A5UdA-CdKbtV-BEeor8-9QCBNc-BEeiV4-AnzRcX-AJaA6F-LvZYMx-Lp6hqB-Lp6eN2-KyZofL-L5yBP5-LsZV2q-KyZnkE-Lp6ce4-LsZJqq-L5yJv1-LsZK4E-Lp6bui-L5yH81-LsZRqC-H5VLyN-NETstV-C6sJge-BLBGym-yNwi7T-7A5UhC). Submitted by [Mark Cartwright](https://www.worldhistory.org/user/markzcartwright/ "User Page: Mark Cartwright"), published on 20 January 2017. The copyright holder has published this content under the following license: [Creative Commons Attribution-NonCommercial-ShareAlike](https://creativecommons.org/licenses/by-nc-sa/4.0/deed.en). This license lets others remix, tweak, and build upon this content non-commercially, as long as they credit the author and license their new creations under the identical terms. When republishing on the web a hyperlink back to the original content source URL must be included. Please note that content linked from this page may have different licensing terms.